What is the personal dashboard?
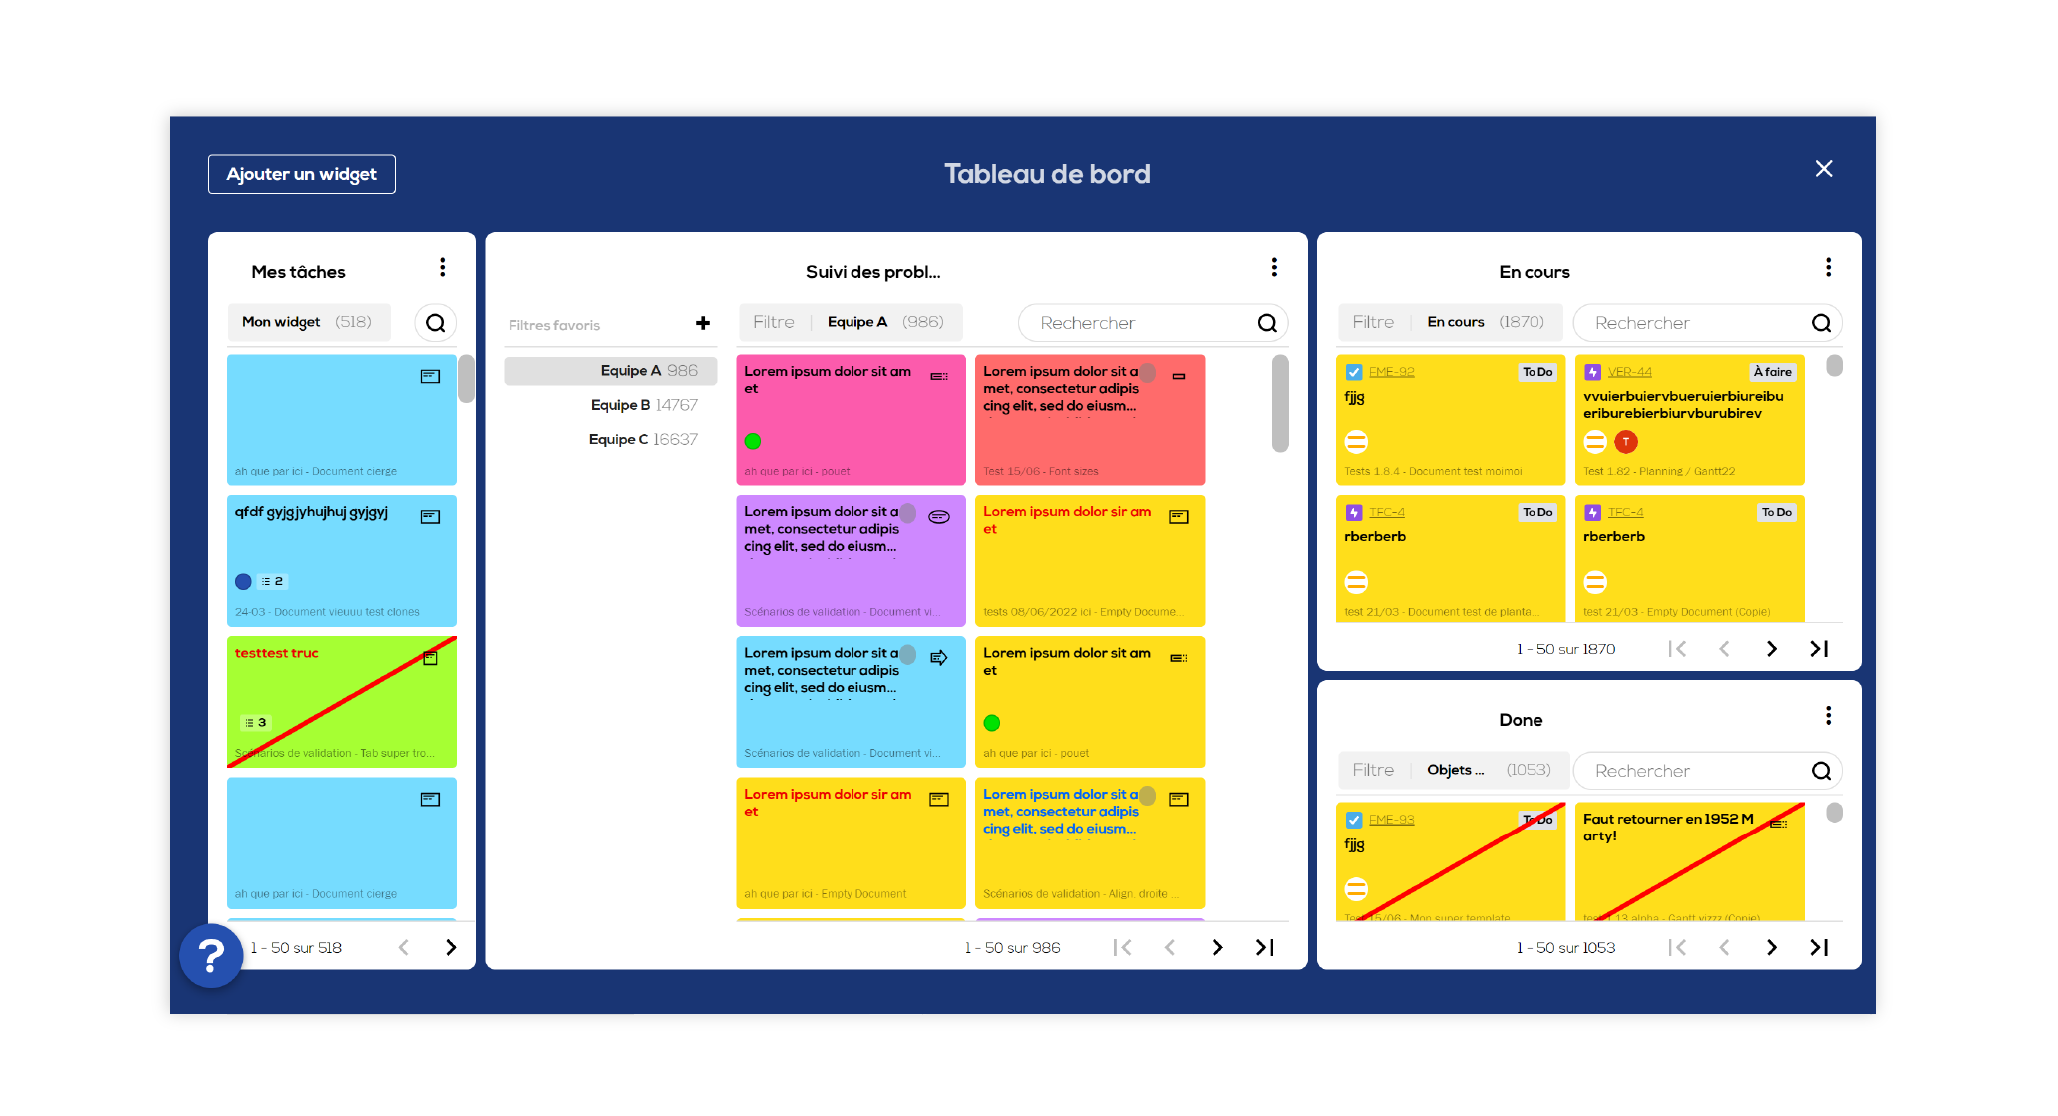
The dashboard is an interface enabling you to display post-its and Jira cards from all your projects according to several customizable filters. For exemple, you can choose to show all of the post-its that are assigned to you. Or all post-its that are crossed out etc...
Start to use the dashboard
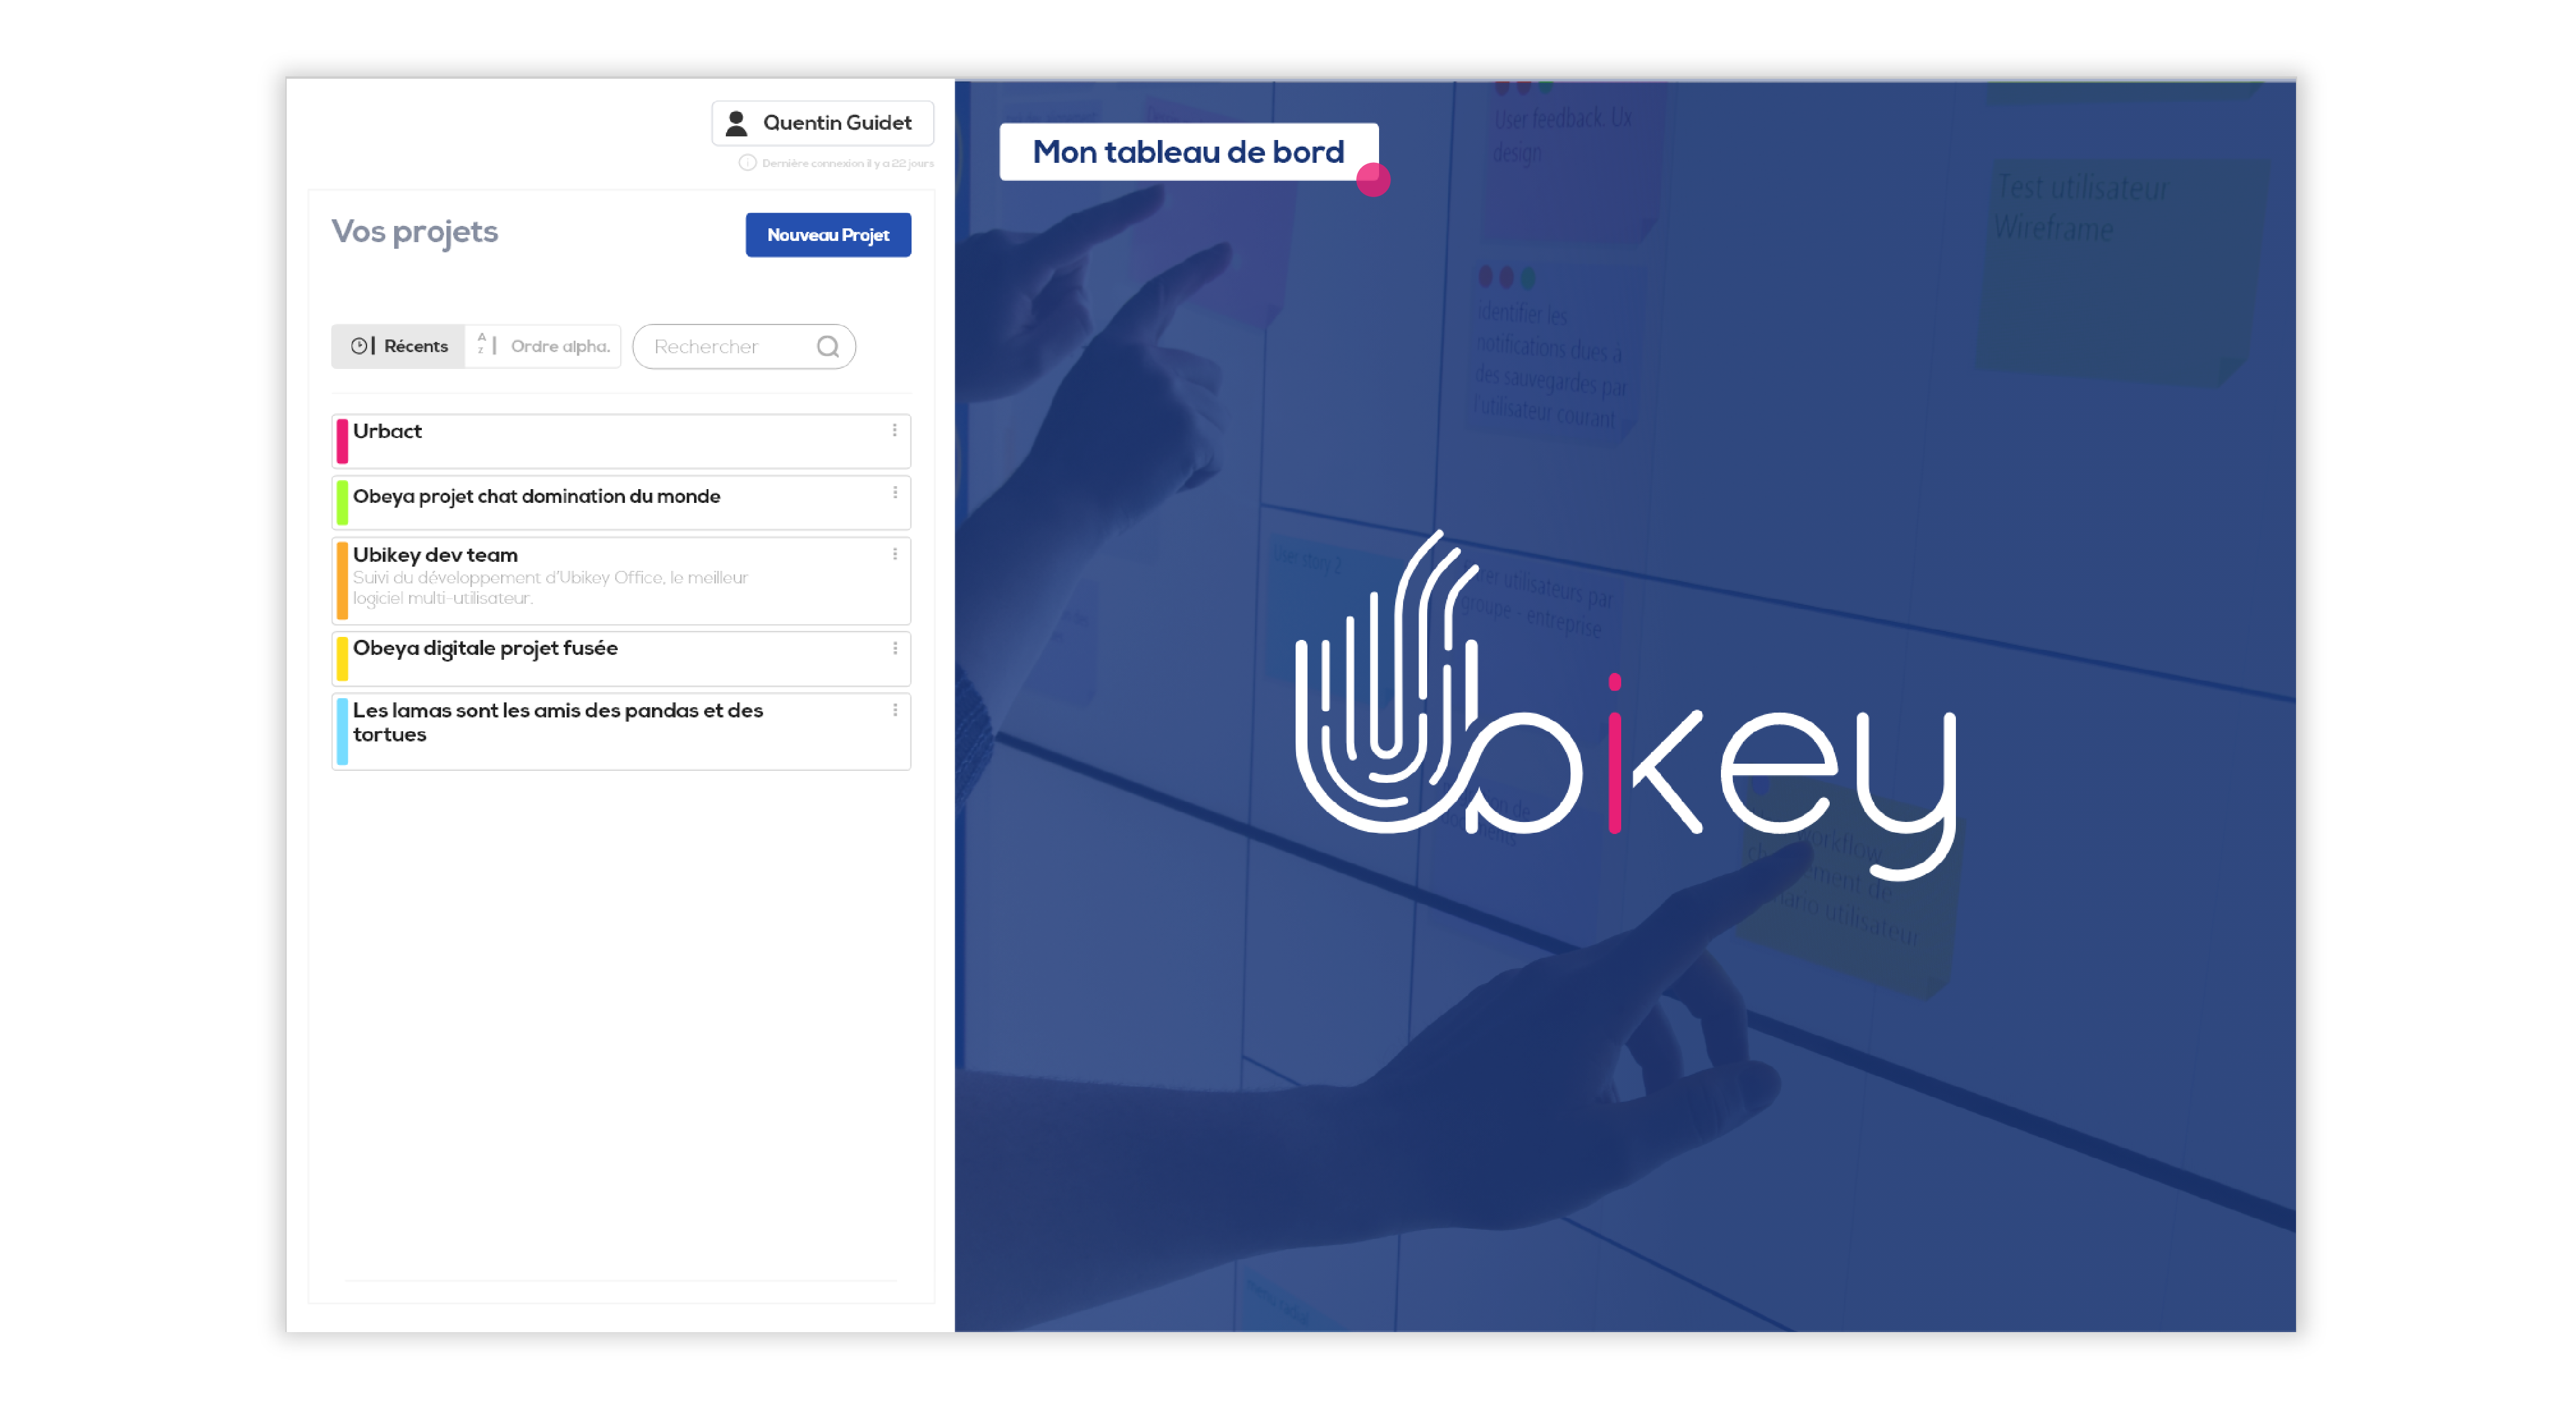
Open Ubikey and go to the "projects" page, then click on "My dashboard".
Your personal dashboard opens : click on "Add widget" and select "List widget".
List widgets
This type of widget enables you to display items (post-it or JIRA cards) from your projects according to filters.
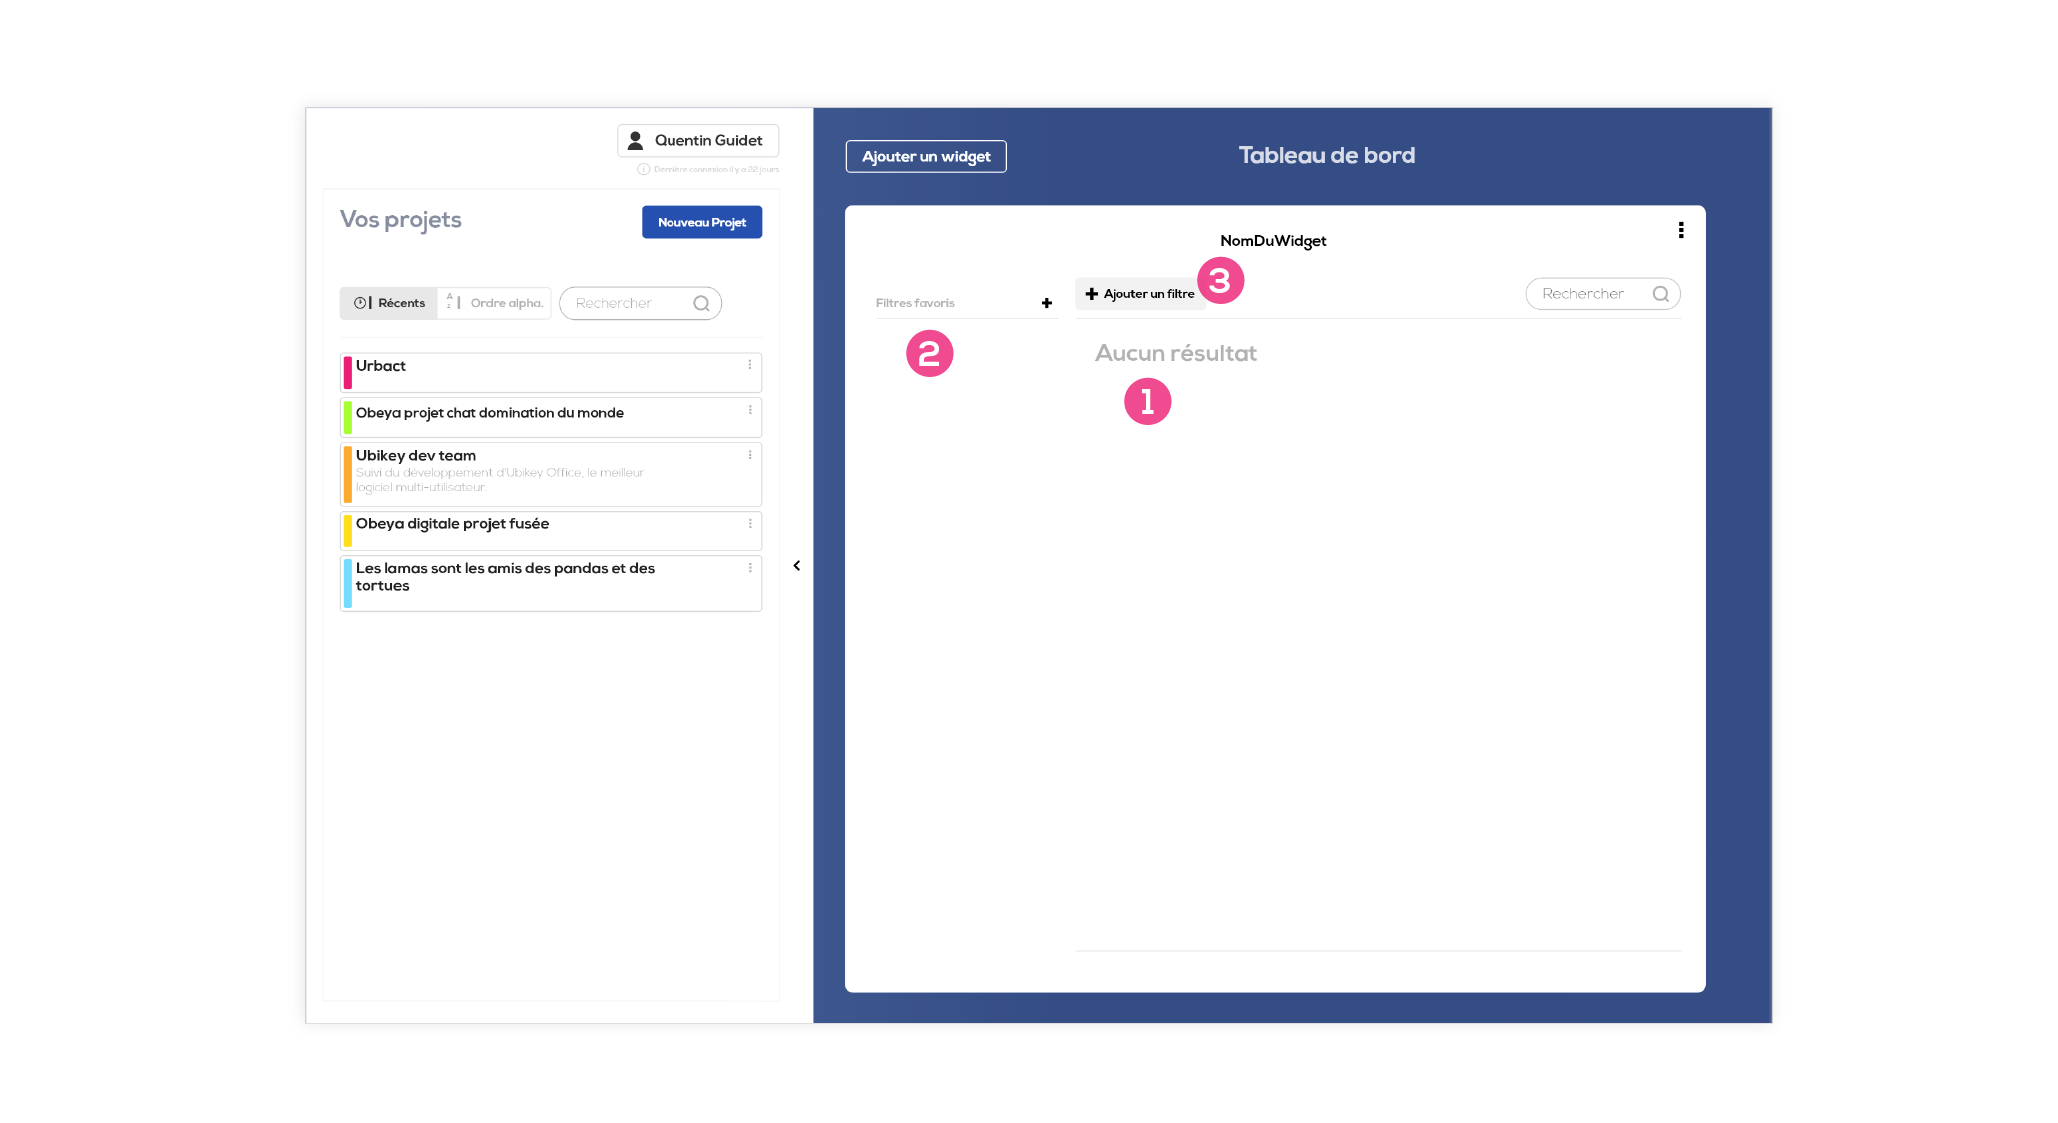
1 - This area will display the post-its and Jira cards matching the selected filter. For now, no filter is selected.
2 - This area will enable you to show and access your favorites filters.
3 - Click on "Add filter" to start to use the dashboard and select "New filter".
Create a filter :
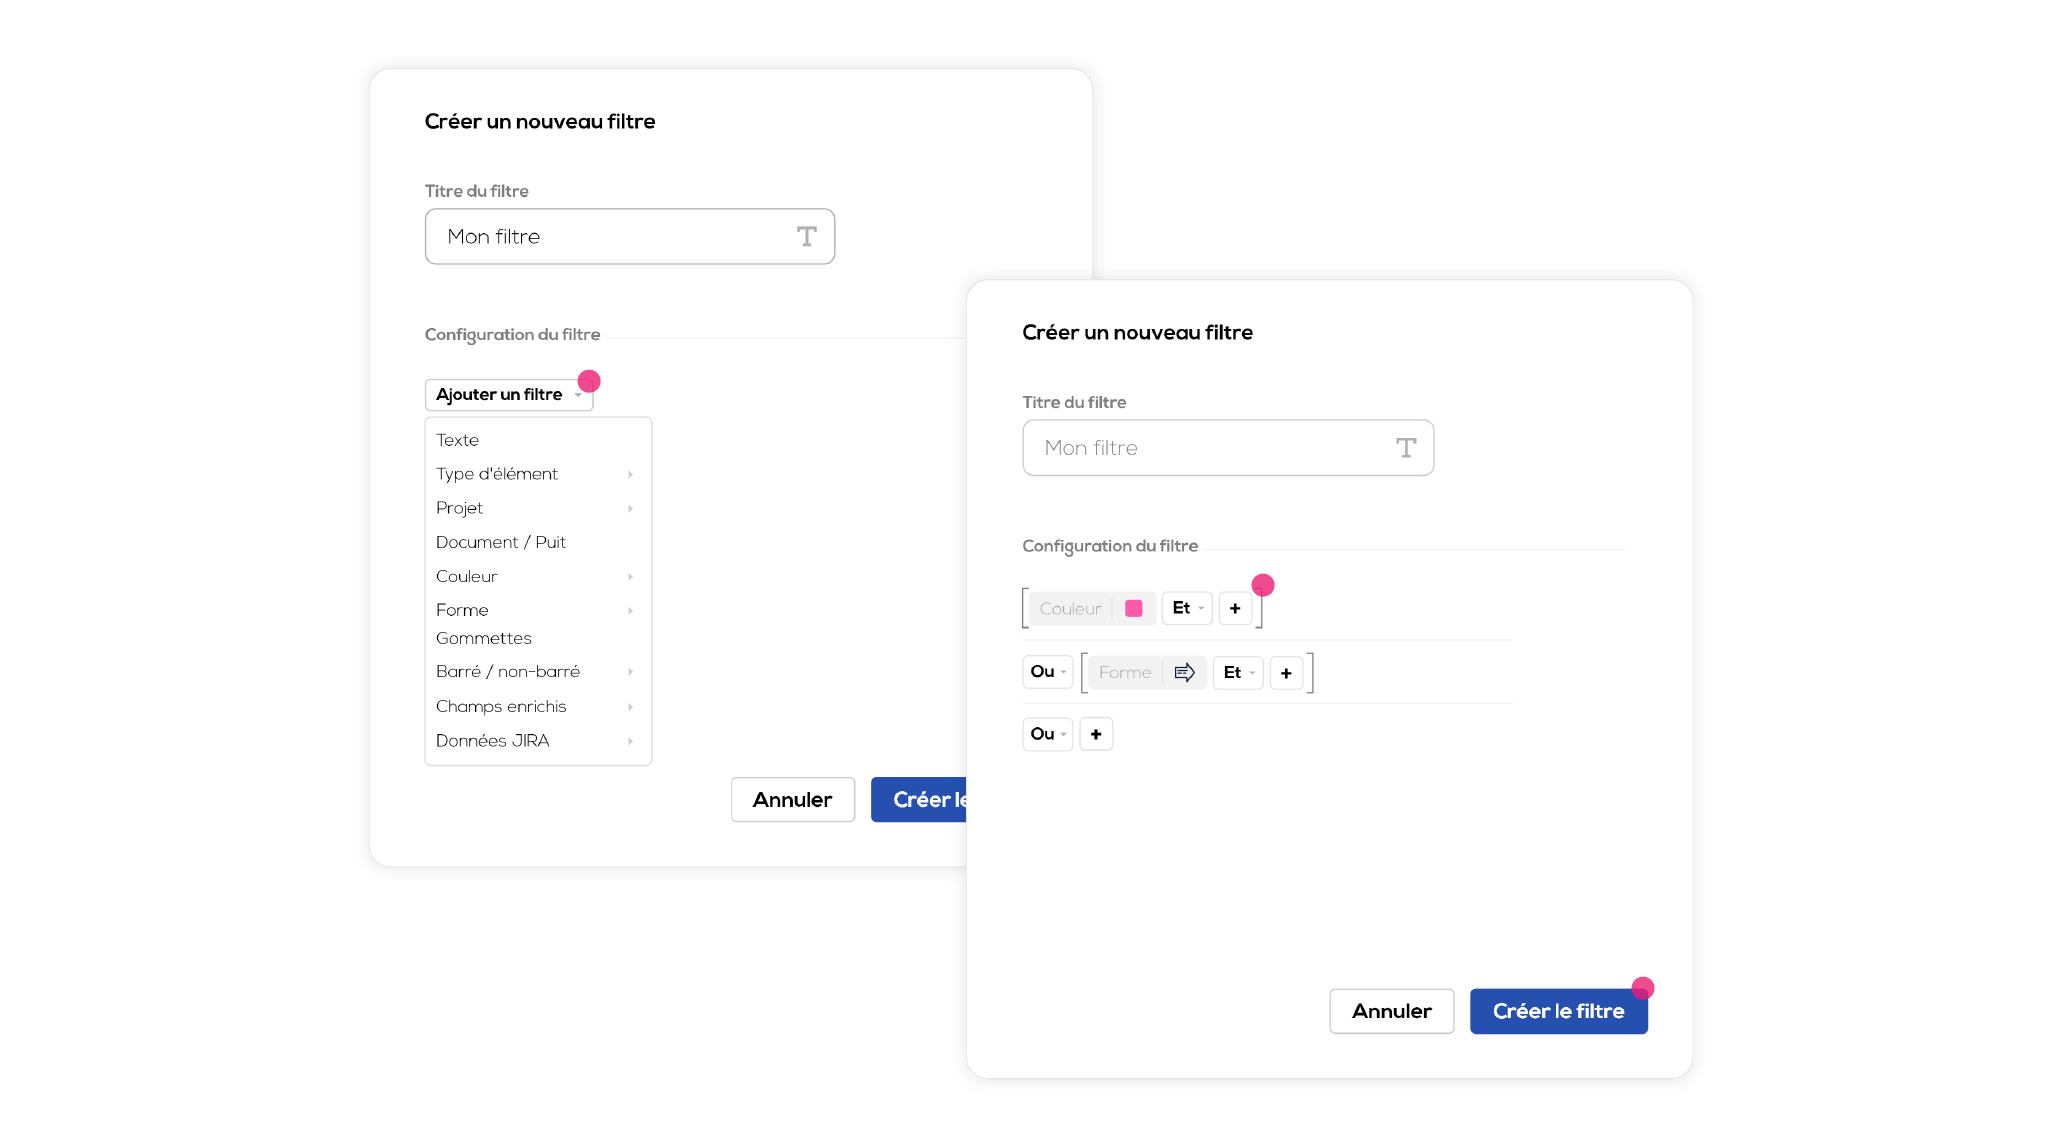
Filters enable you to choose which items you want to show in a widget according to criteria.
Click on "Add filter" and select the desired criteria. You can put your filter together freely thanks to the operators "and" and "or" and to the different lines availables.
When your filter is ready, click on "Create filter".
Availables criteria :
- Text : the filter will look for the typed in text in the post-its/JIRA cards main text area.
- Item type : enables you to only show items that are post-its or JRIA cards.
- Project : enables you to only show items from a specific project.
- Document / portal : enables you to only show items from a specific document or portal.
- Color : enables you to only show items of a specific color.
- Shape : enables you to only show items of a specific shape.
- Stickers : enables you to only show items that has at least one sticker of the color.
- Crossed / not crossed : enables oyu to display only crossed or not crossed items.
- Text extended field :

Enable you to ony show item that has the text in the field.
The "None" option enables you to show items of which the field is empty.
- Numeric extended field :
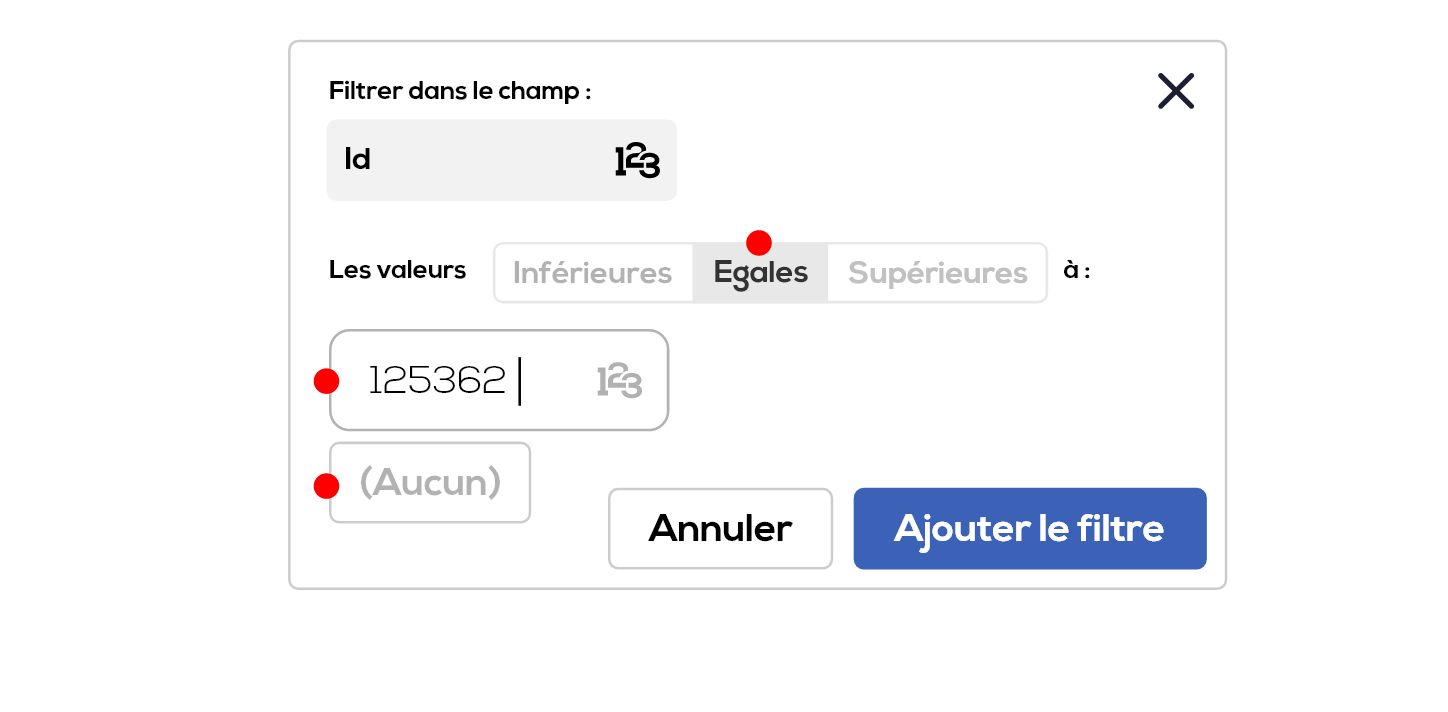
Enables you to show only the items that have a lower, equal or upper value in the field.
The "None" option enables you to show items of which the field is empty.
- Date extended field :
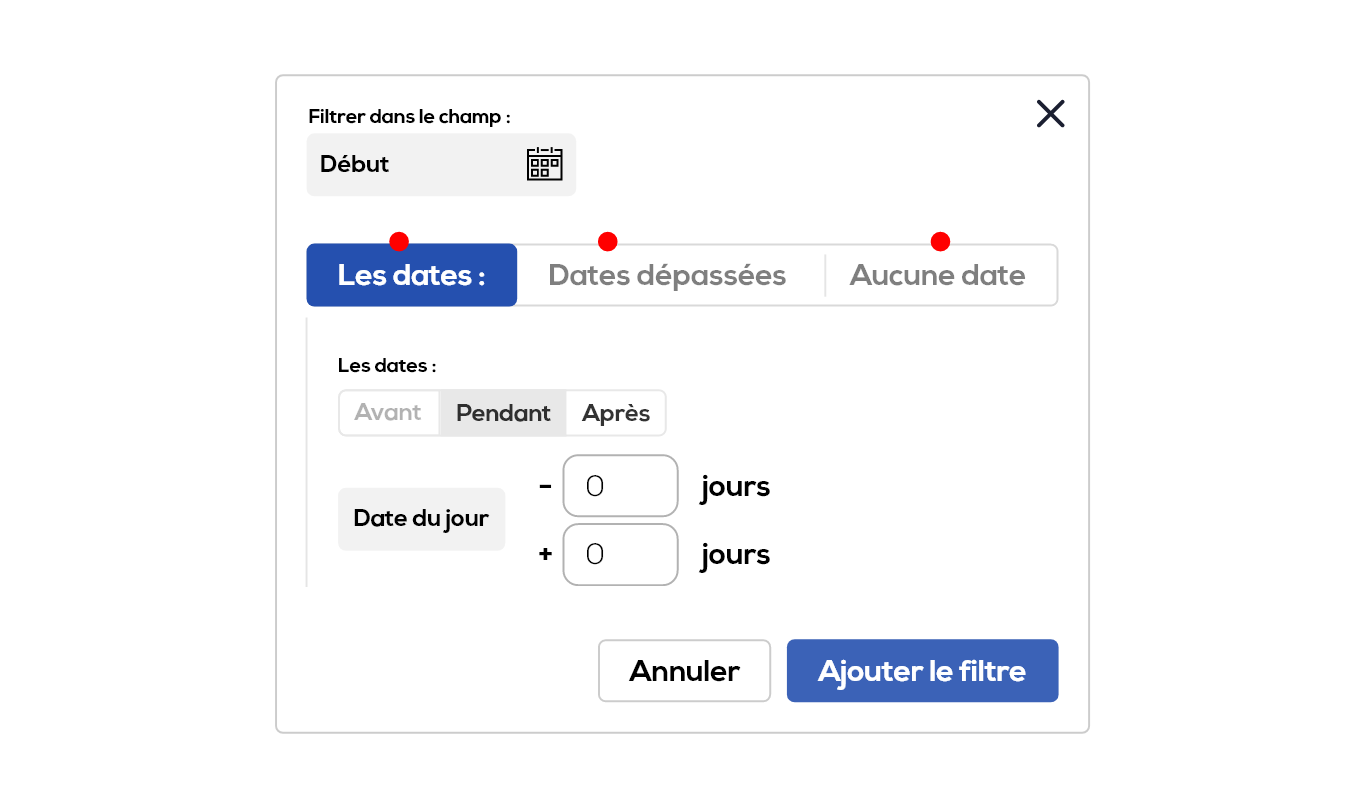
Enables you to filter date before or after current date plus or minus x days or during a period of time relative to the current date. In all cases, the filter will be updated daily according to the current date.
For example, if you need to show tasks that start next week, you will have to configure : the dates, during, current date -0days / +7days. This way the filter will show item of which the date is between now and 7 days from now.
The expired date filter enables you to quickly create a filter that show item of which the date is before current date.
The No date filter enables you to show items of wich the date is empty.
- Duration extended fields :
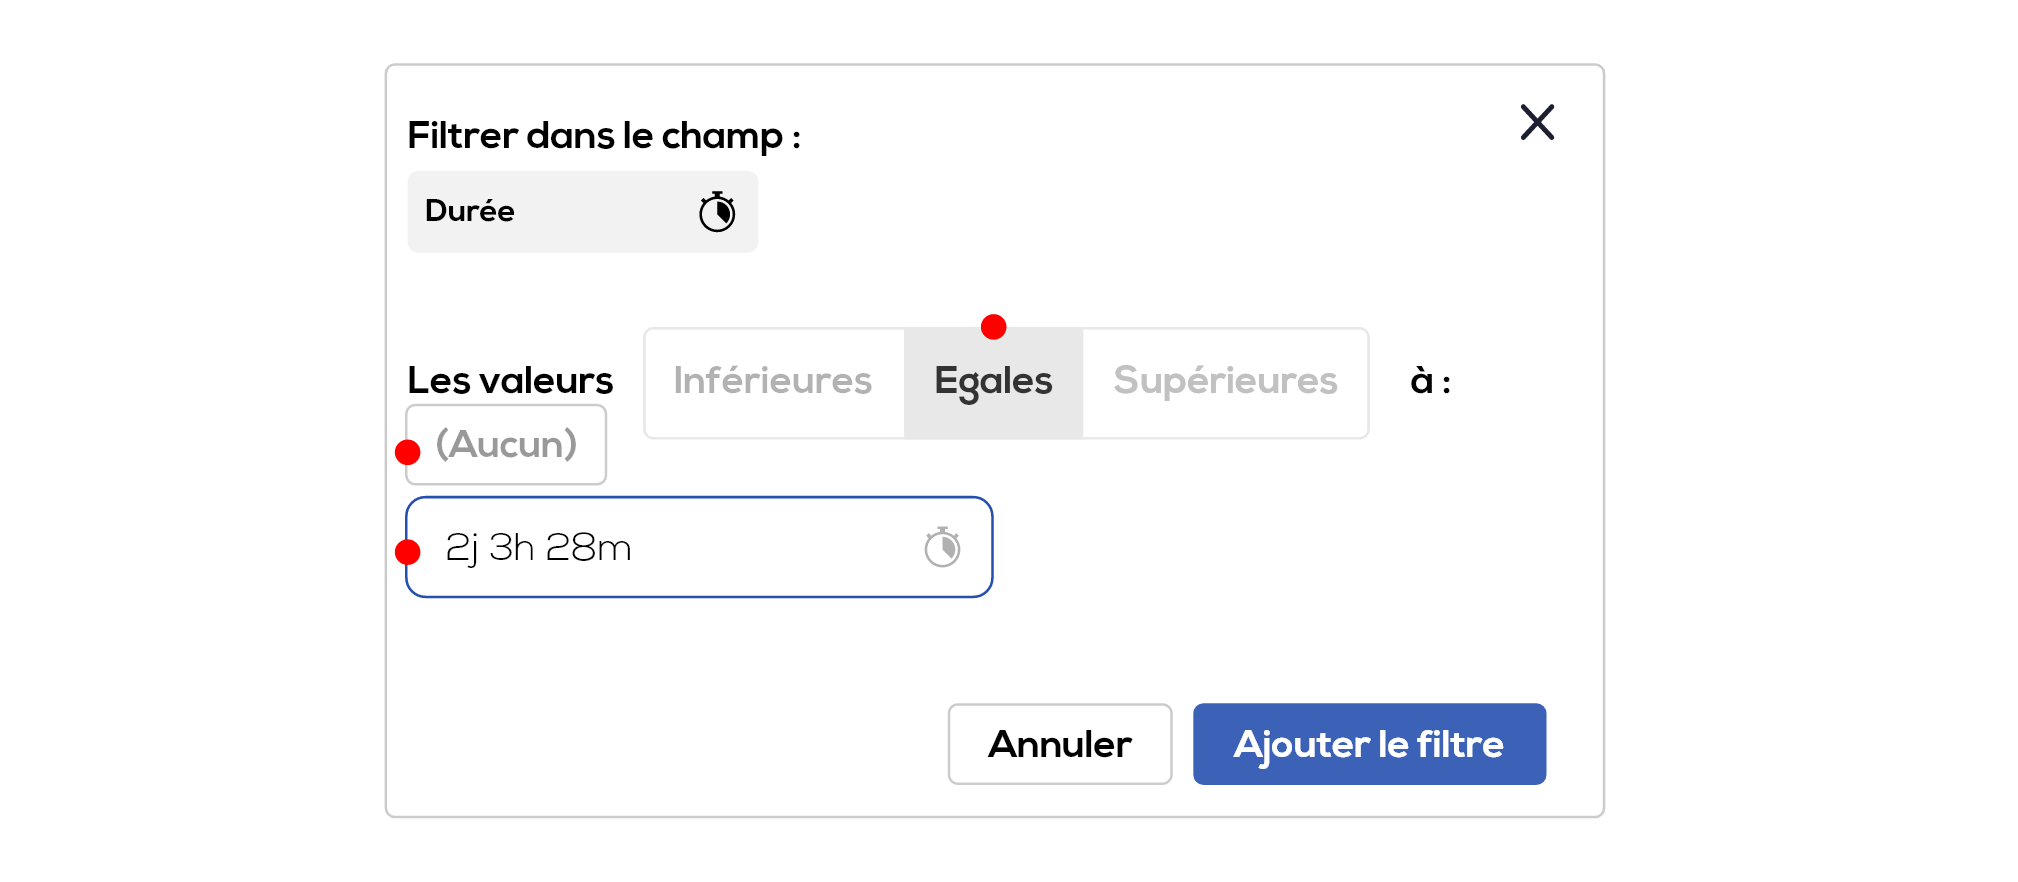
Enables you to show only items of which the duration is lower, equal or upper to the specified duration.
The none option enables you to show items of which the duration field is empty.
- List extended field :

Enables you to show items of which the list field value match the selected value.
The none option enables you to show item of which the list field is empty.
- Member extended field :
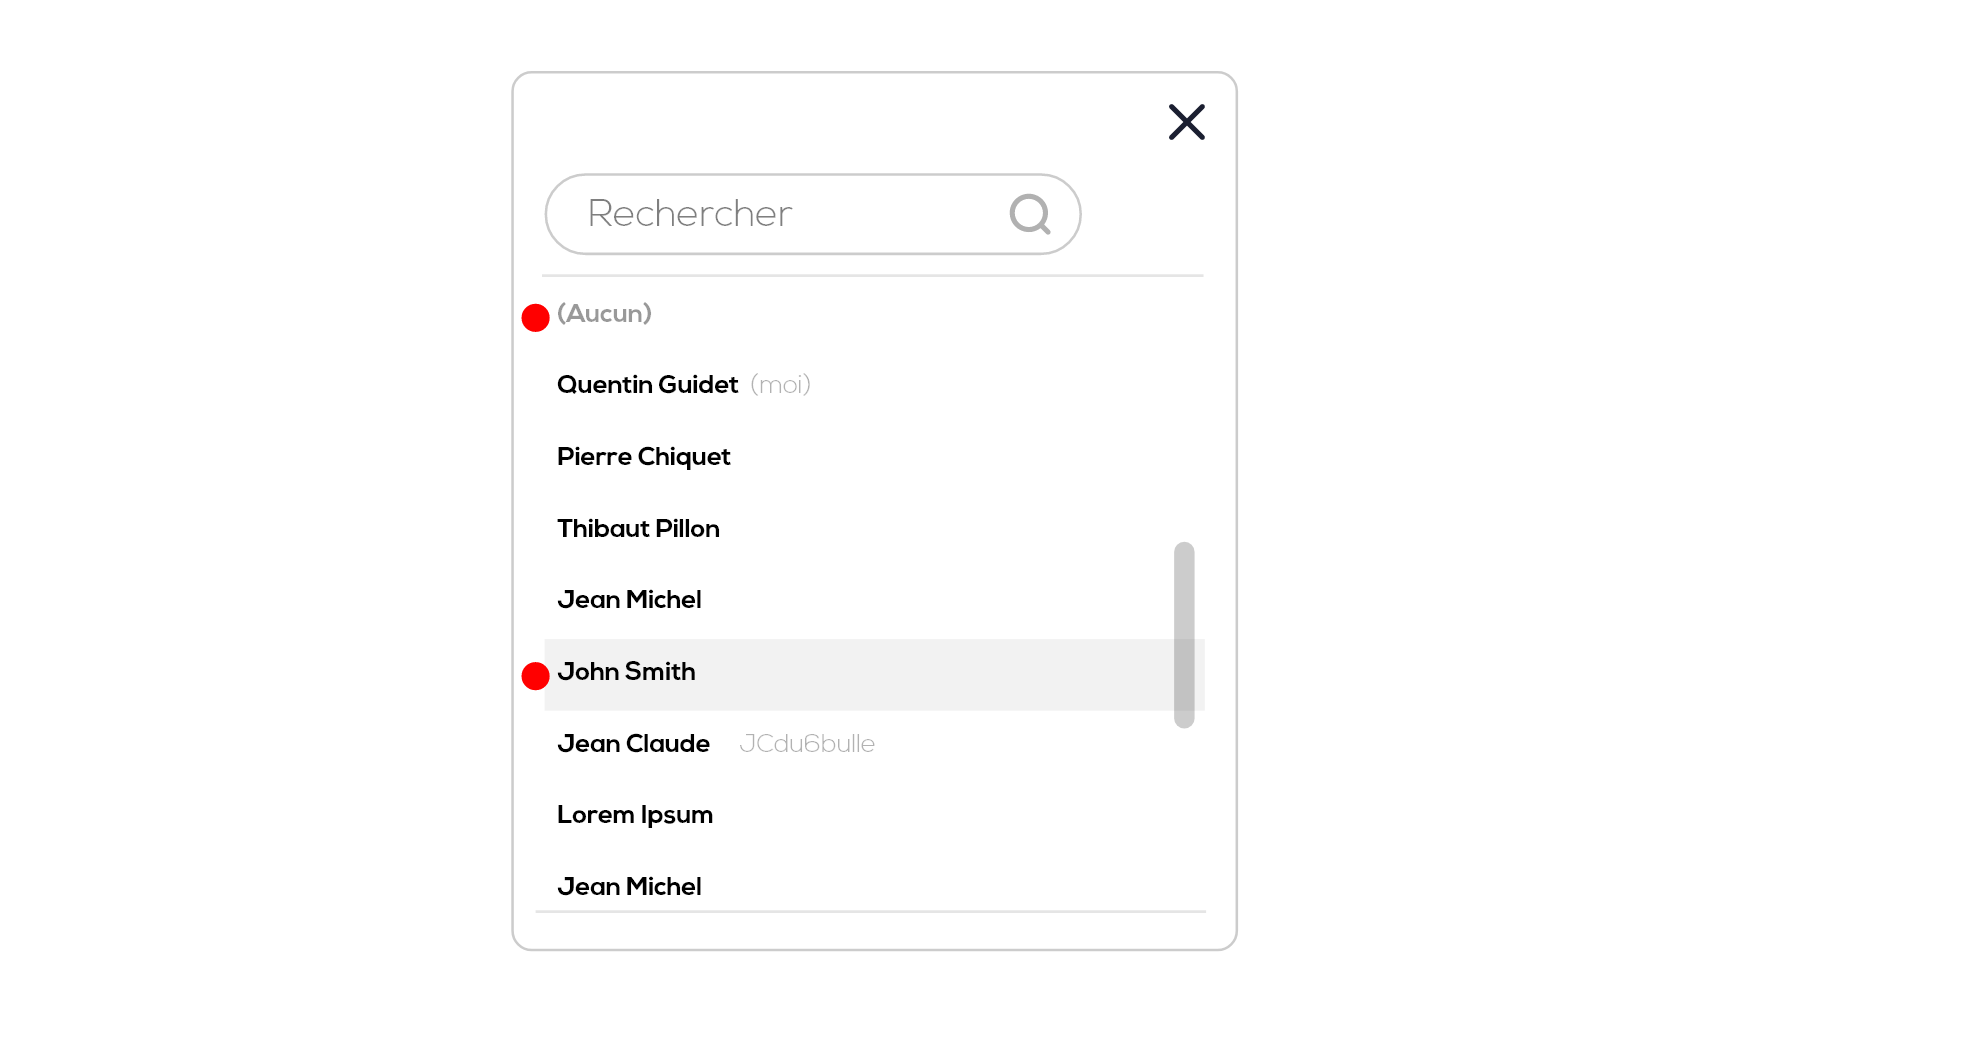
Enables you to show items of which the member field match the selected member.
The none option enables you to show items of which the member field is empty.
The list widget :
1 - Click on the post-its or Jira cards to access the detailed view.
2 - Click on the active filter applied to the list to select another filter.
3 - Add a filter to your favorites filters.
4 - Click on one of your favorite filter to apply it to the list as active filter.
5 - Search the list of filtered post-its and Jira cards.
The setup of your dashboard is saved with your personal account parameters. It will be available every time you connect to Ubikey.
Right click on one of your favorite filter. From this menu you can :
- "Add filter" : Select an existing filter to be added to your favorite filters.
- "New filter" : Set up a new filter and add it to your favorite filters.
- "Remove filter from list" : The filter won't be displayed anymore as one of your favorite filters (it will be saved and you will be able to use it later on if needed).
- "Edit filter" : Change the filter criterias and/or name.
Click on one of the displayed item. The detailed view opens. You can find here all the datas associated with the item : project and document, text, color, stickers, shape, crossed/not crossed, extended fields, links, linked items, glued items and synchronized post-its.
You can now edit some of these data directly within the dashboard (all except : linked items, glued items and synchronized post-its), simply click on the data you want to edit.
Click on "See within document" to open the document which contains the item in a new tab.
Counter widget
This widget type enables you to display the number of items from your projects that corespond to the associated filter's criteria.
Click on "Add widget" and select "Counter filter".
Choose a name and click on "Select filter", then select an existing filter or set up a new filter the same way you did for the list widget (all filters are compatible with all types of widgets). Click on "Create widget".
The counter widget is added to your dashboard, it displays the number of items matching the selected filter. To edit or delete the counter, click on the "Menu" icon on the top right of the counter.
Organise your dashboard
You can combine several widgets together to compose you very own dashboard fitting your daily monitoring of your projects.
Resize the widgets by dragging the sides to the wanted dimension. Move the widget by dragging them to the wanted spot.