In order to access the JIRA features, open a document (empty, schedule or table) an click on "Import-Export" in the tool bar.
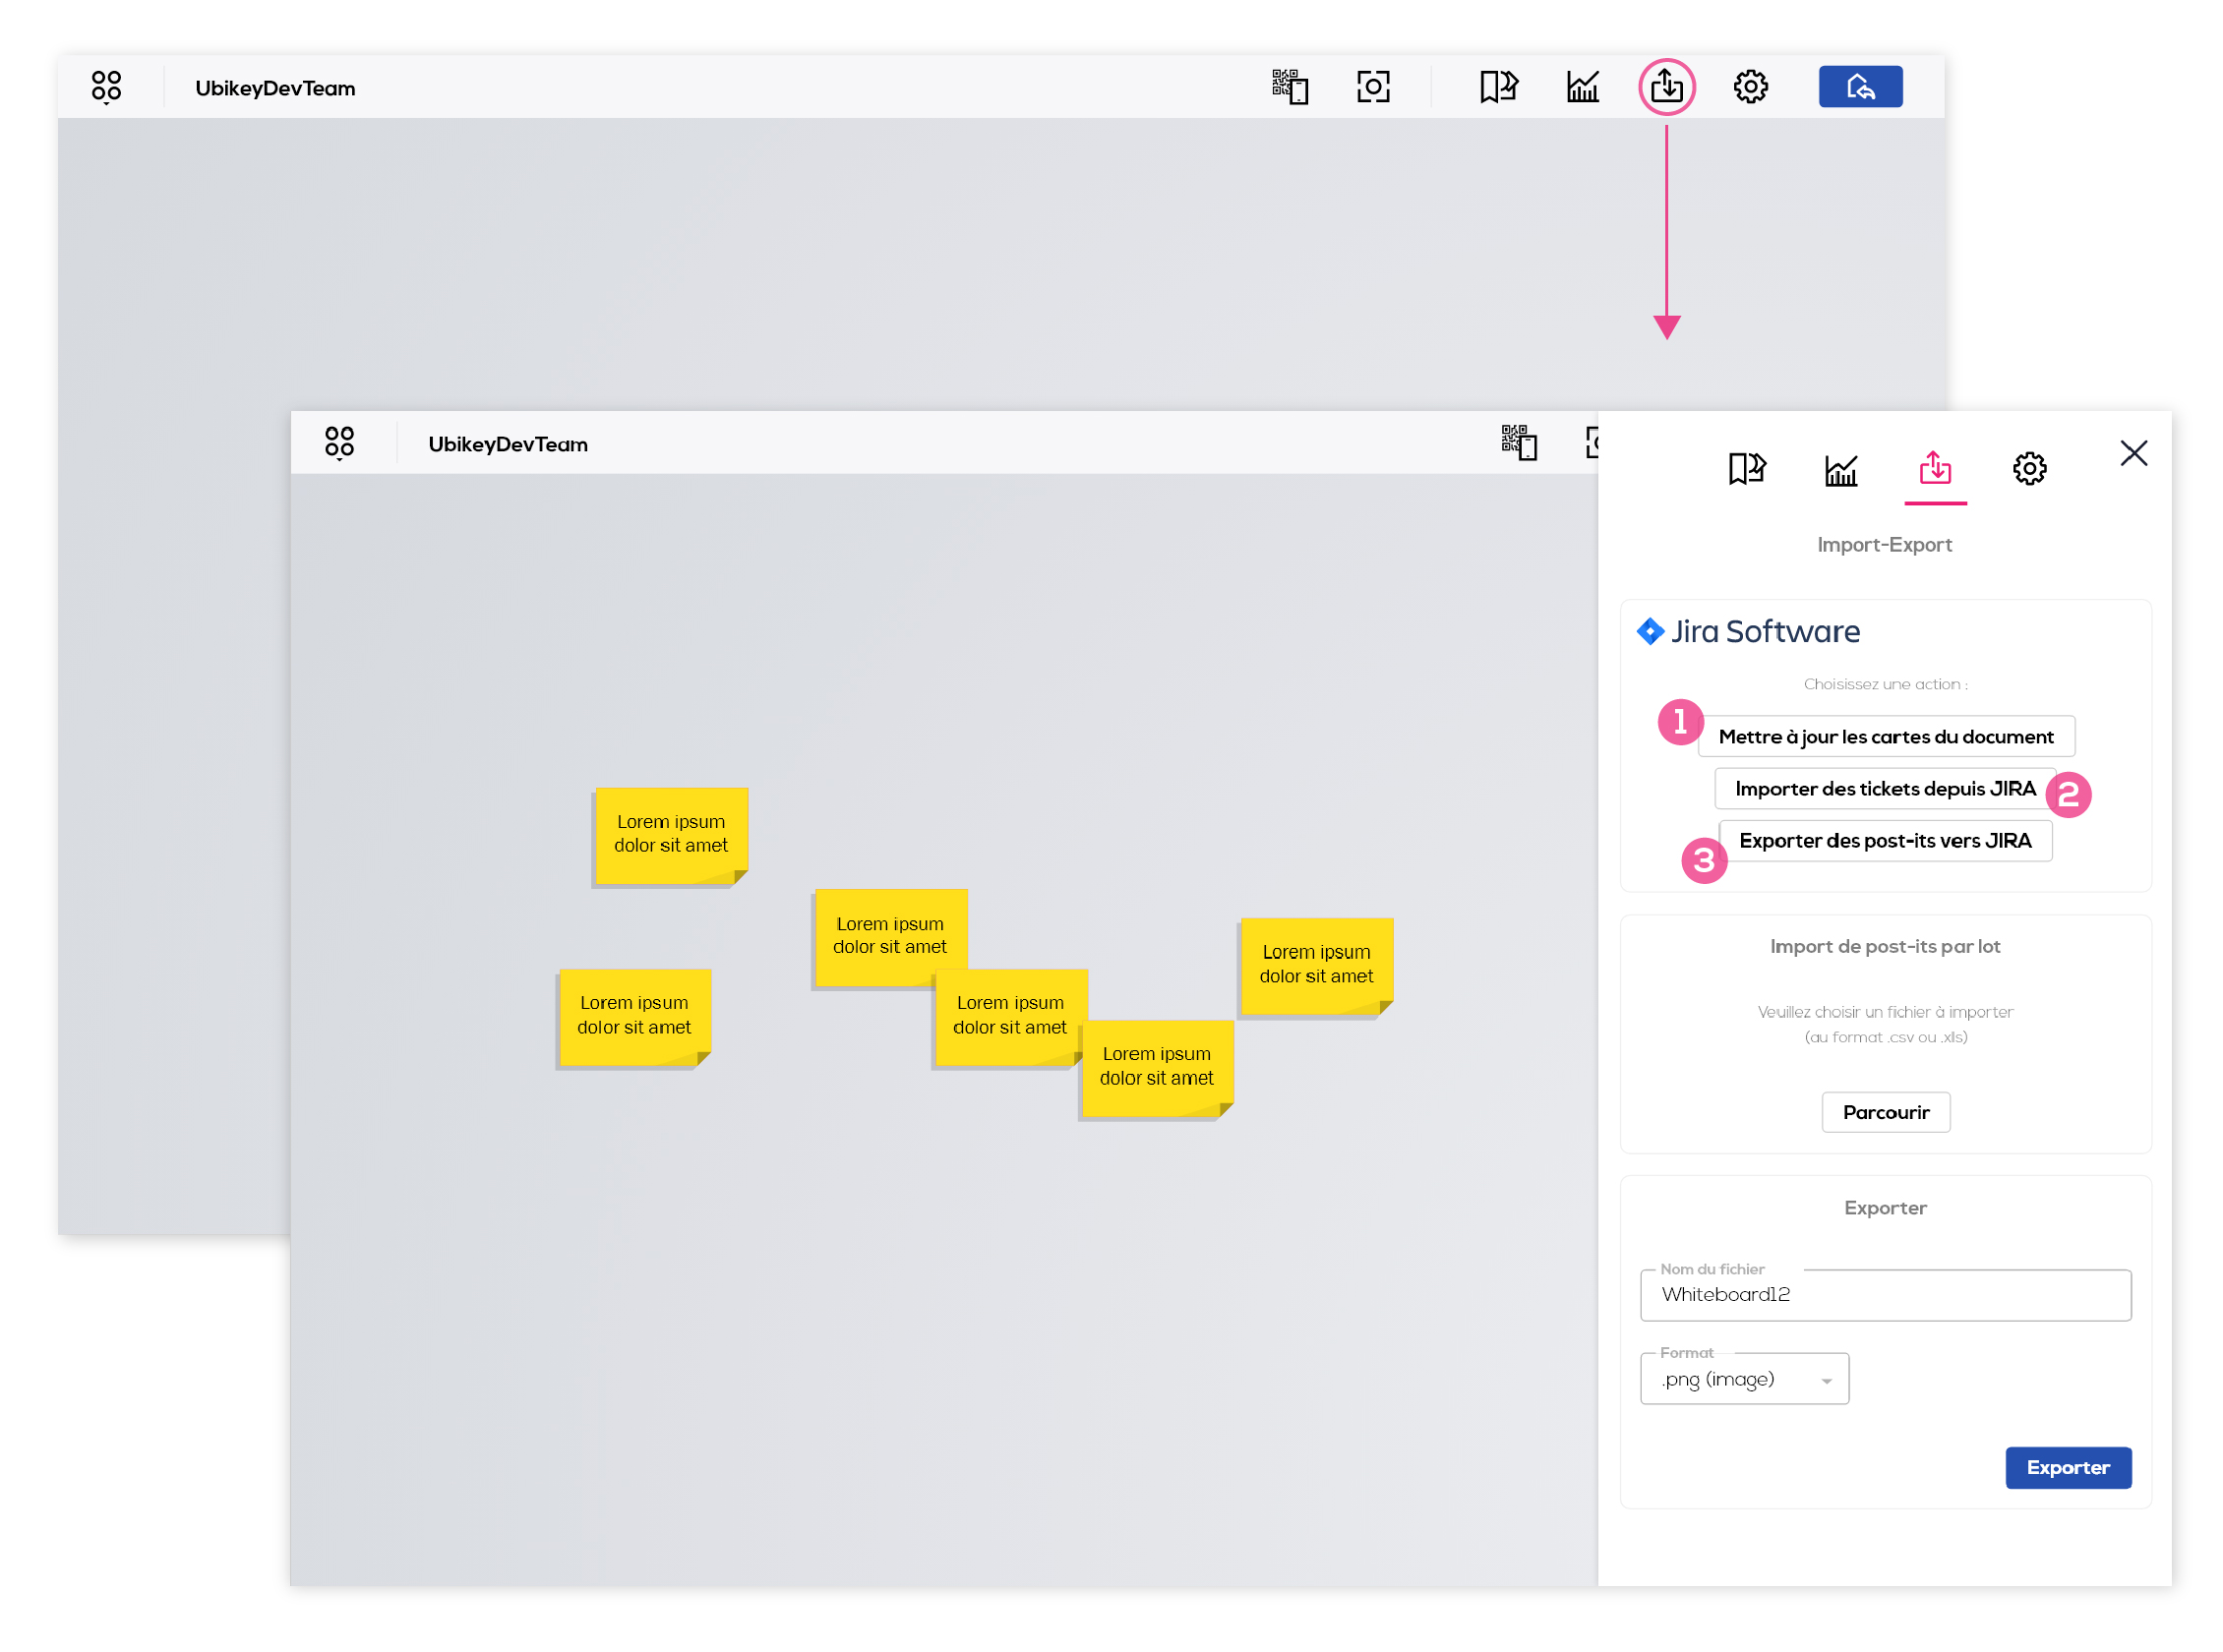
1 - "Update documents JIRA cards" enables you to update data of the cards that have already been imported in this document from your JIRA project.
2 - "Import tickets from JIRA" enables you to import and use your JIRA tickets as cards in your Ubikey document.
3 - "Export post-its to JIRA" enables you to convert your post-its into tickets in your JIRA projects.
Click on "Import tickets from JIRA"
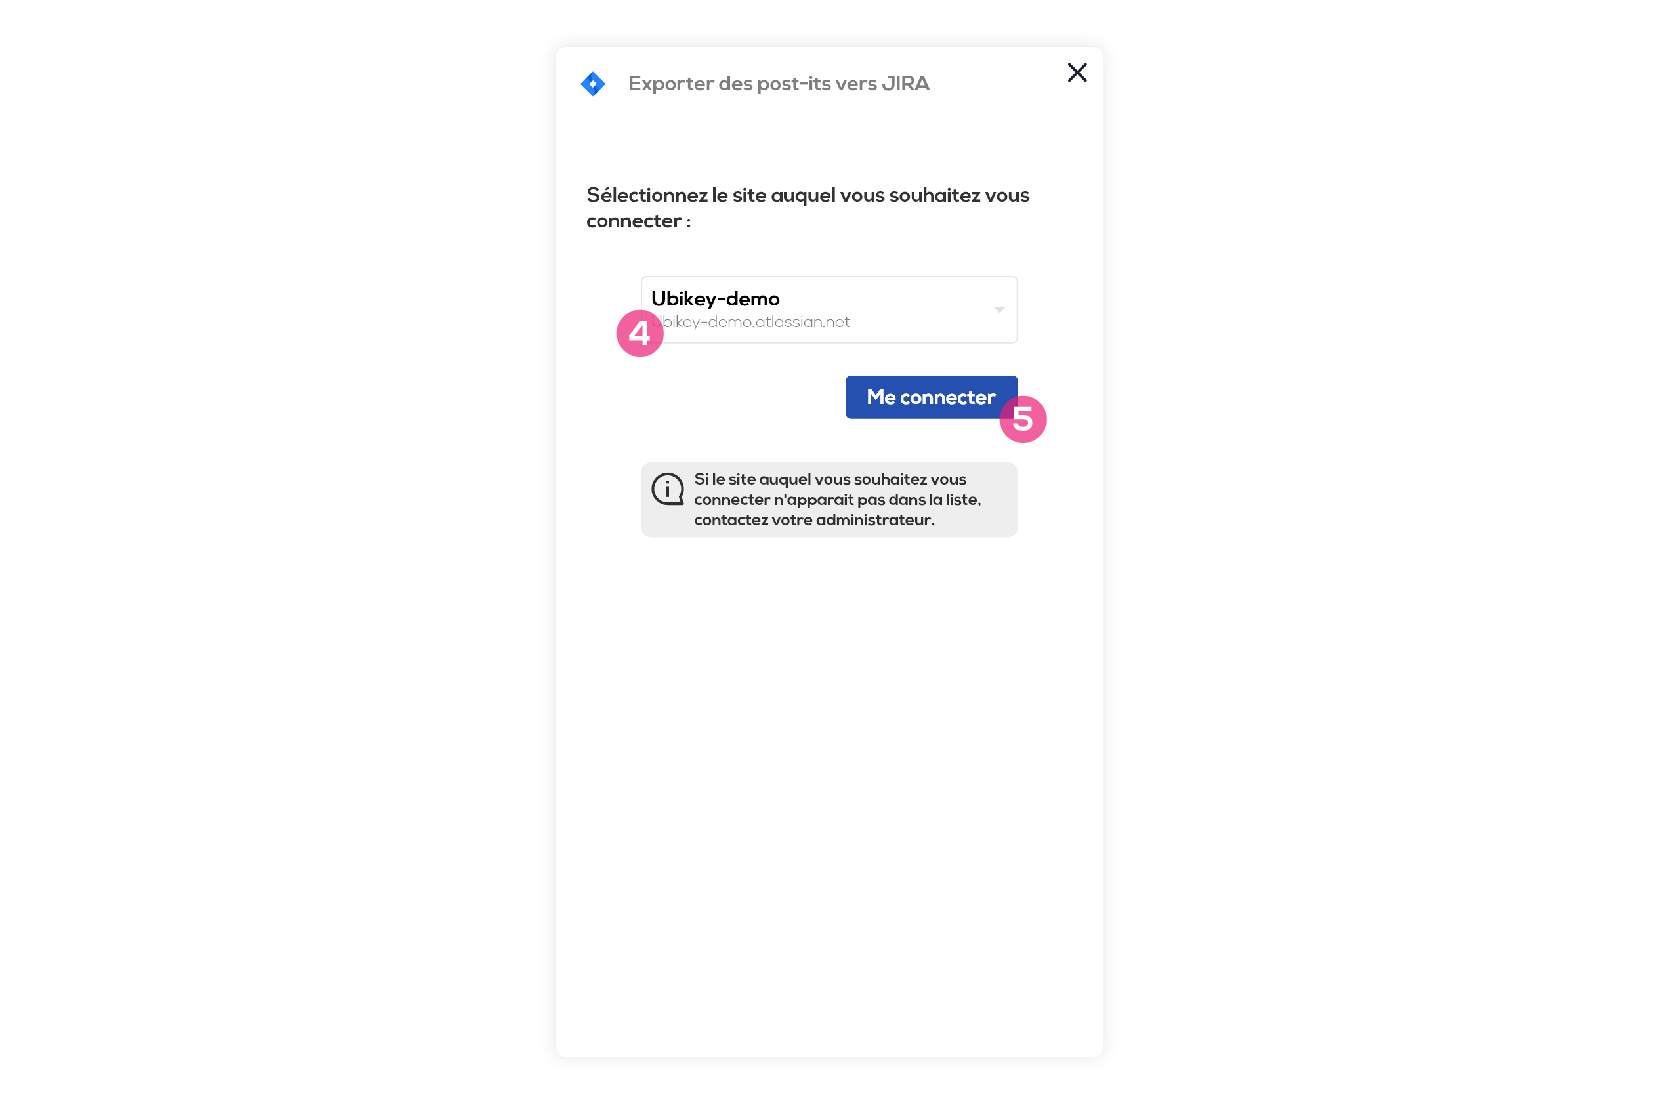
4 - Choose which JIRA site your want to import from. This site must have been set up by your administrator in order to be accessible here.
5 - Click on "Connection"
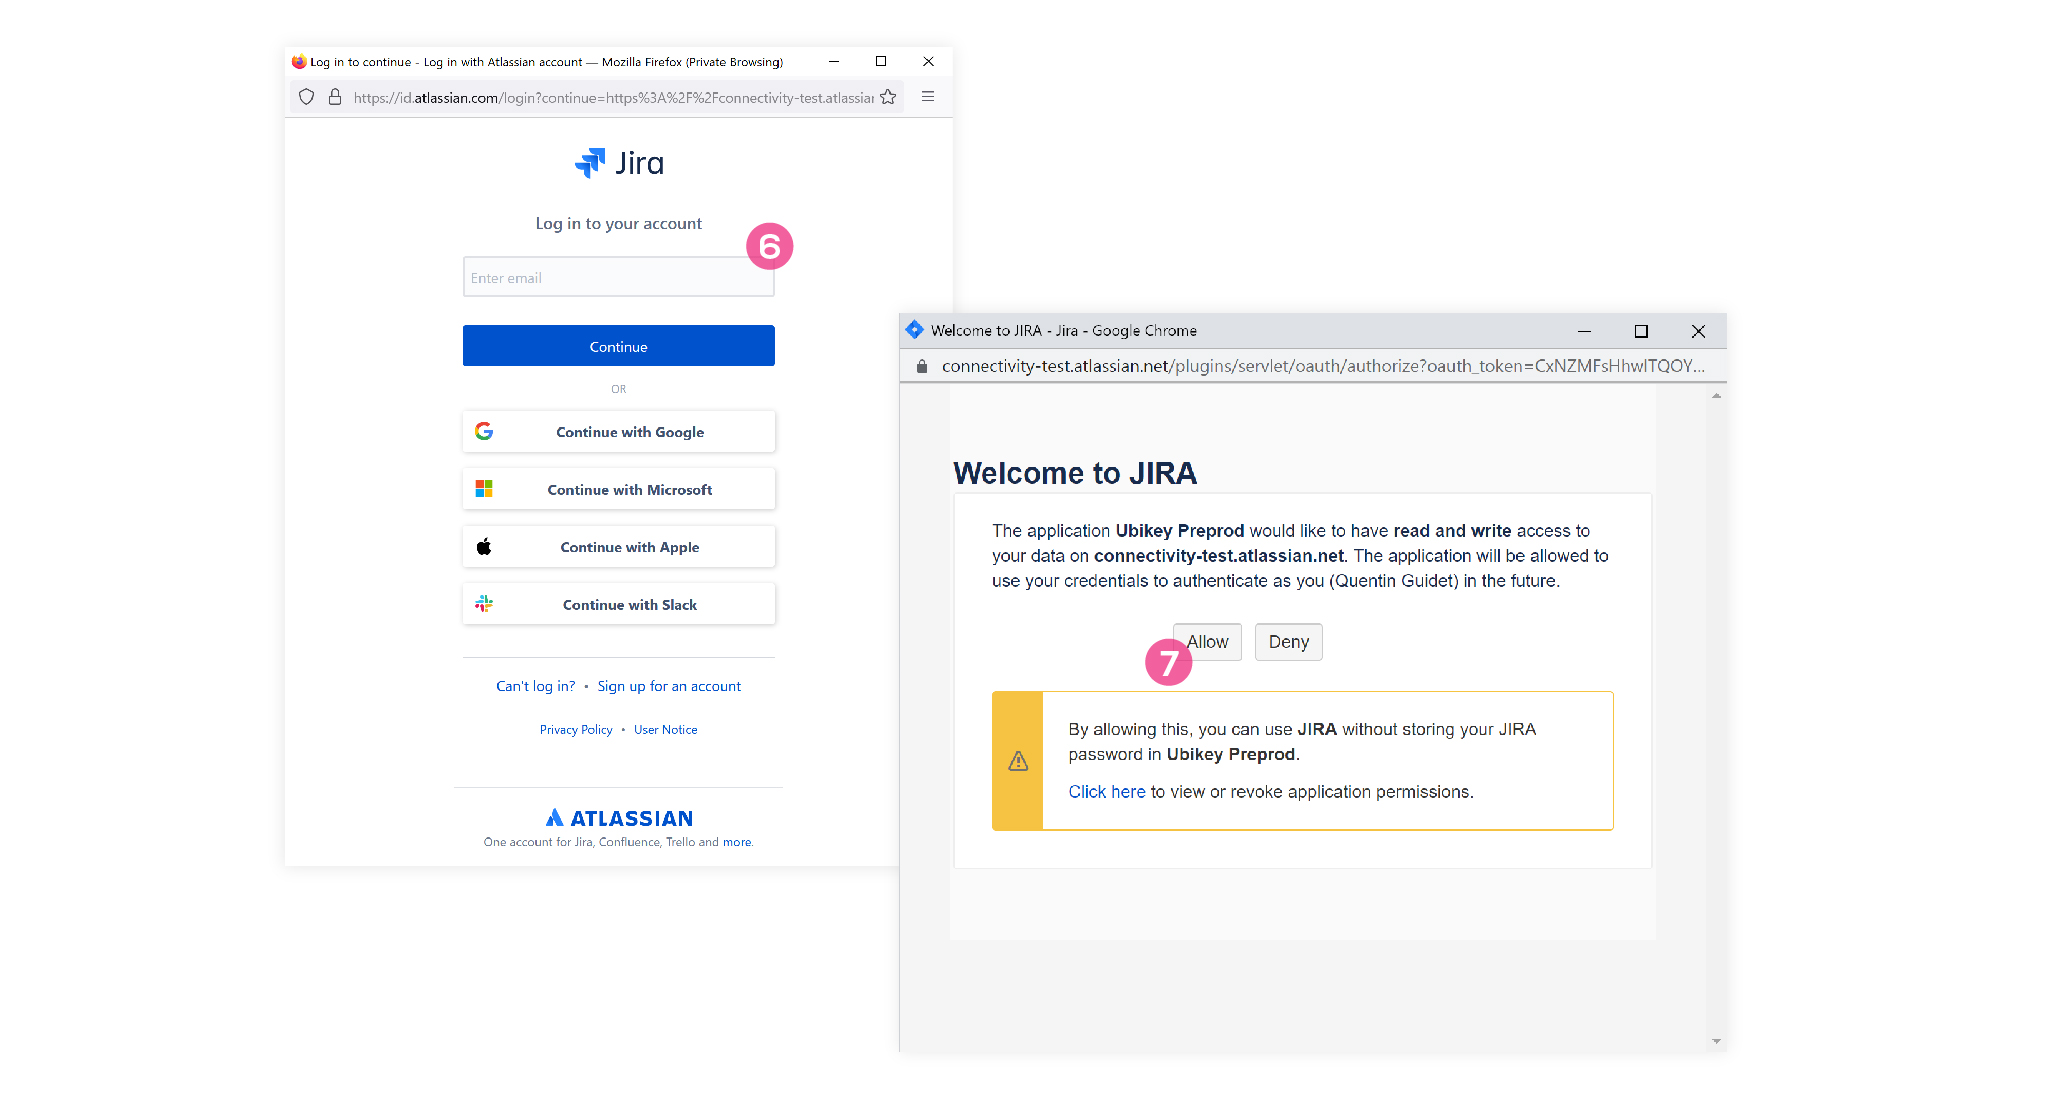
6 - Connect to your JIRA site using your regular way. If your login details have been saved in your browser, then you will not have to type them again and will go directly to step 7.
7 - Click on "Allow" to authorize access to your JIRA site.
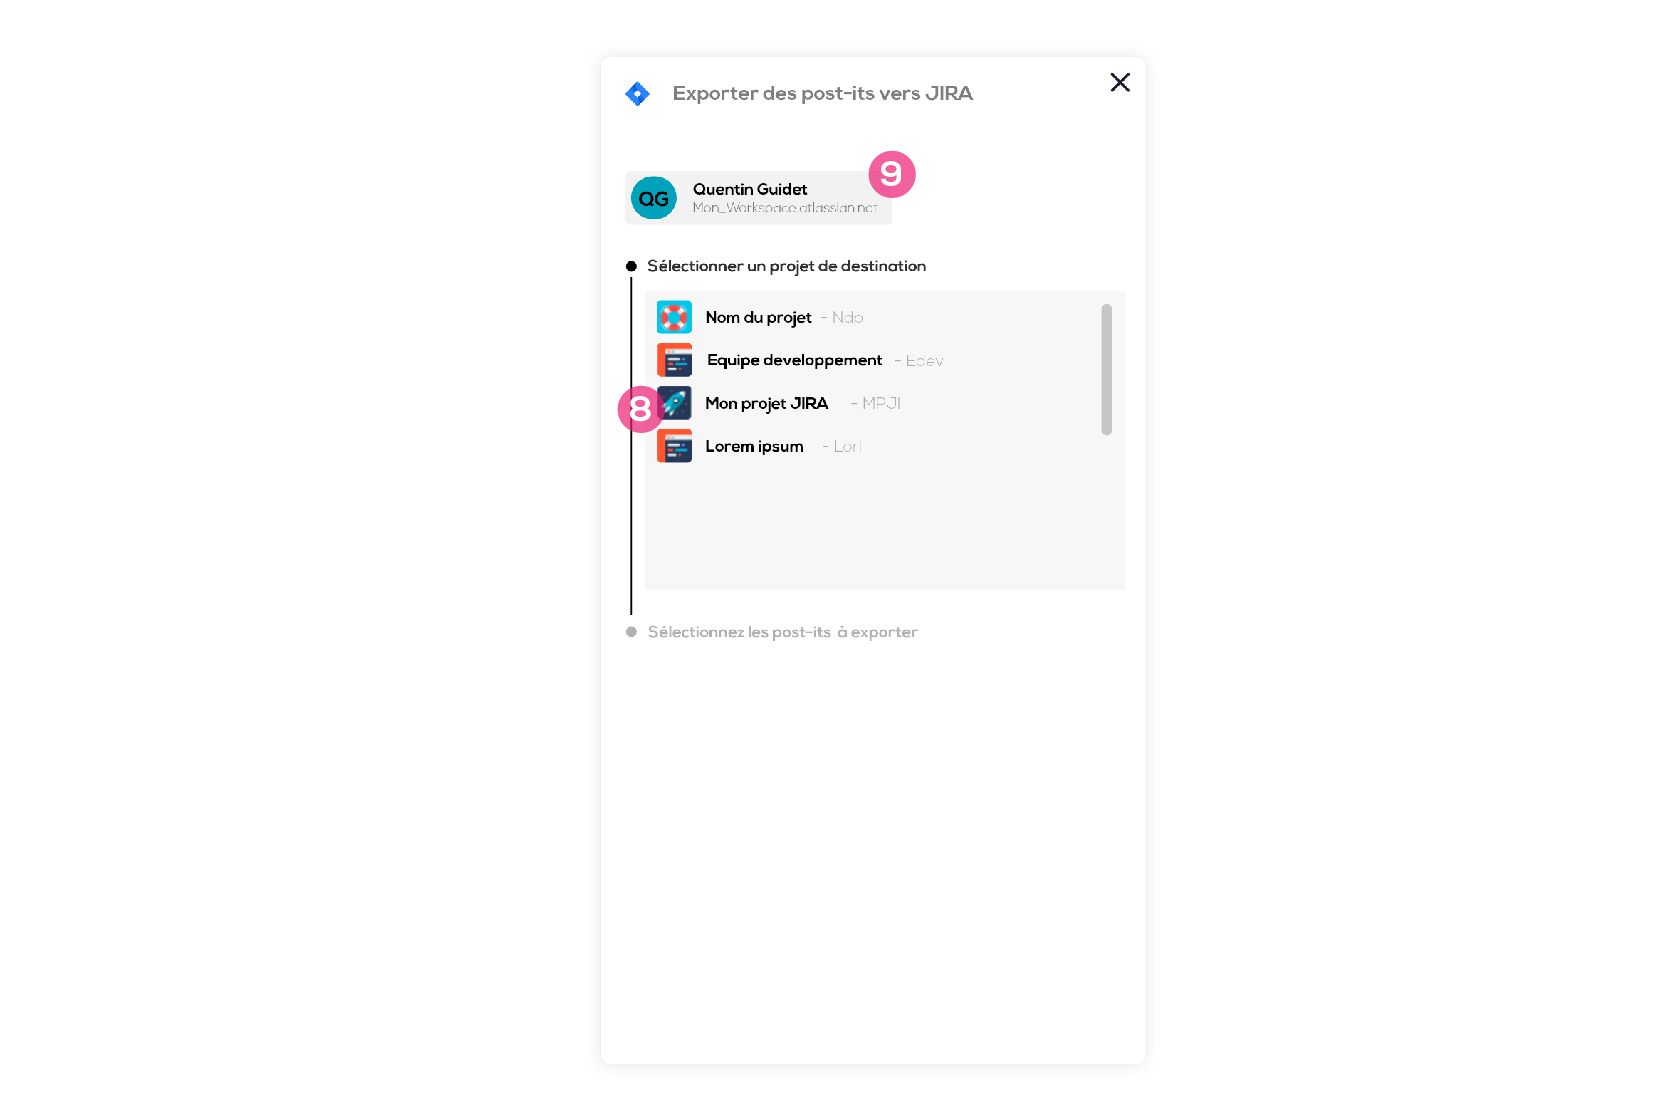
8 - Select the project in which tickets will be created.
9 - Click on your username to connect to another site.
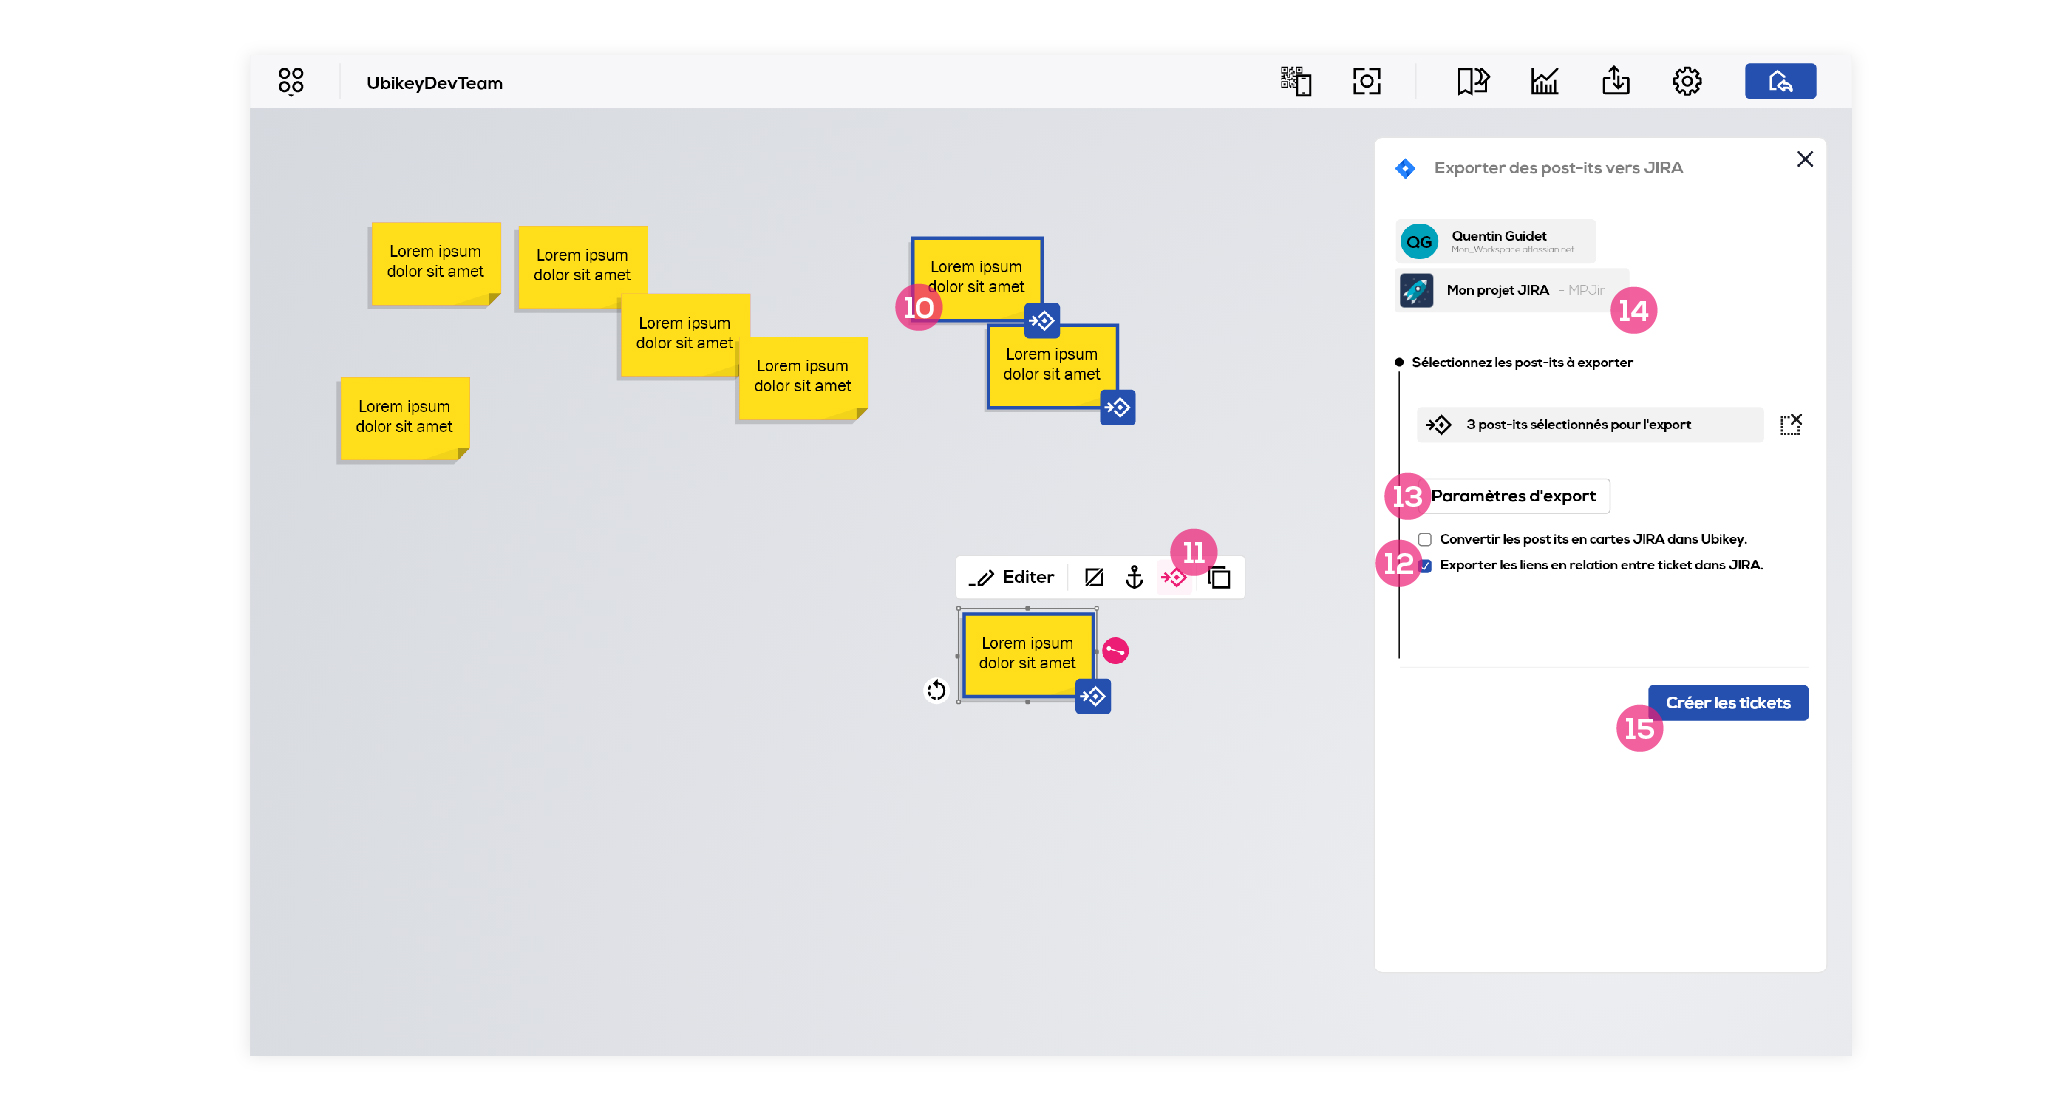
10 - Click on the post-its to export to select them. You can simultaneously select several post-its thanks to the selection box (hold shift). You must type a text on the post-its you want to export, this text will be used as summary for the JIRA tickets.
11 - To unselect a post-it, click on the "JIRA export" option in the post-it menu (click on the post-it to open the menu).
12 - The option "Convert post-its into JIRA cards within Ubikey" enables you to convert your post-its into cards linked to the corresponding ticket created in your JIRA project. You will be able to update these cards later with your JIRA projects data (Update documents JIRA cards).
The option "Export links into relationships between tickets within JIRA." enables you to convert Ubikey links into relationships between tickets within JIRA.
13 - The export settings enables you to configure the way your post-its will be exported (see below).
14 - Click on the project name to change the destination project.
15 - Click on "Create tickets" in order to complete the export. News tickets will be added to your JIRA project.
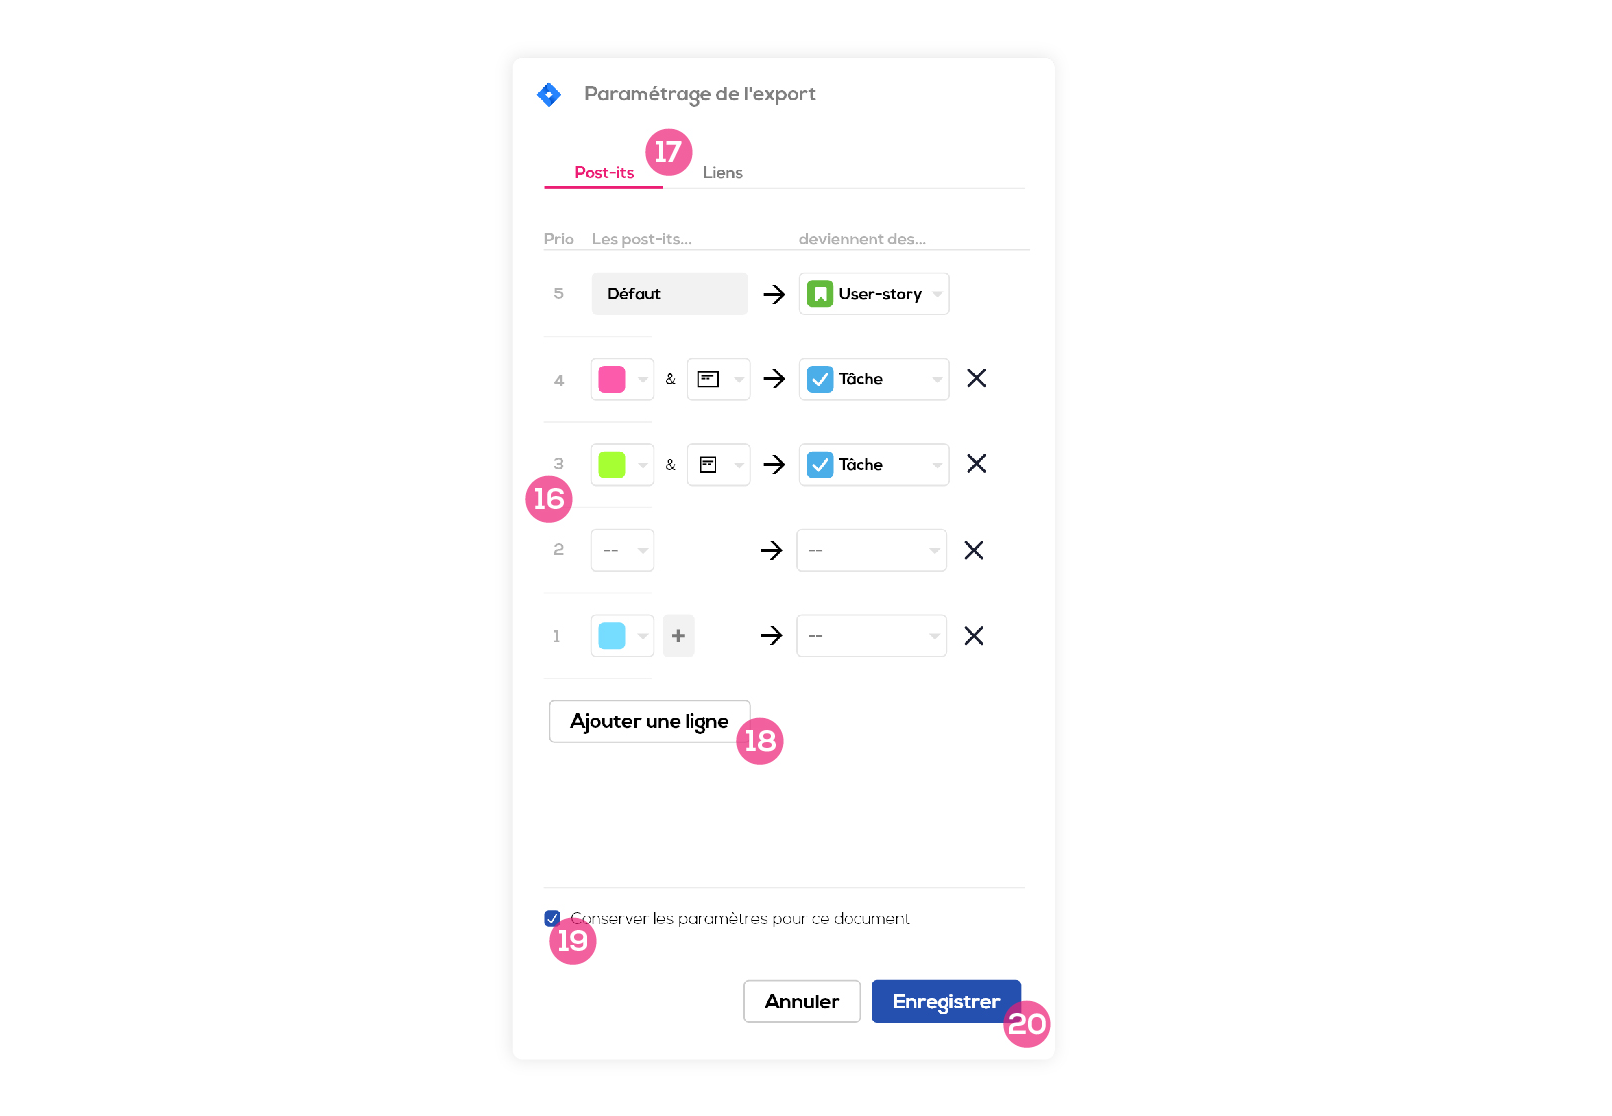
16 - Each line of the list is an export rule. On the left there is the parameters for the Ubikey items (post-it or links) and on the right the associated JIRA parameter (issue type, relationship type). For exemple the second line : post-its that are pink and rectangle will become task tickets in JIRA during the export. The "prio" column define the order of application of the rules.
17 - The possibility to configure the exports settings is available for post-its (issue type) and for links (relationship type).
18 - Click here to add a new rule to the list.
19 - This option allows to save the parameters for this document. The configuration is common to all the project users.
20 - Click on "Save" to validate the modifications.
Related functionalities :
Jira cards
Import tickets from your JIRA project
Update documents JIRA cards